Winter is a magical time for the garden, although it can present a few challenges for composting. However, with a bit of thought and preparation, you can maintain and even create a winter compost pile that continues to nourish your garden. Let me guide you through the process of making a winter compost pile that’s effective and environmentally friendly.
Selecting the Right Spot
The first step to creating a winter compost pile is choosing the right location. It’s essential to place your compost in a convenient, sheltered spot. Ideally, pick a location that is accessible year-round and close enough to your kitchen for ease of adding food scraps regularly.
Avoid low-lying areas where water might accumulate, as too much moisture can hinder the composting process. A slightly elevated spot with good drainage works best, and if possible, position it where it can get some sunlight during the shorter winter days.
Building the Pile
Constructing your compost pile for winter months requires a bit of layering and planning. Start with a base layer of coarse materials, such as small branches or straw, to help with drainage and aeration.
Add a thick layer of browns, which are carbon-rich materials like dry leaves, cardboard, or newspaper. These materials are crucial in balancing the wet and nitrogen-rich greens you’ll be adding throughout the season.
Next, incorporate a layer of greens, which include food scraps, coffee grounds, and fresh garden clippings. Alternate layers of browns and greens, ensuring each layer is about 6-8 inches thick. This layering will help maintain a balanced carbon-to-nitrogen ratio, which is vital for efficient composting.
Covering the Pile
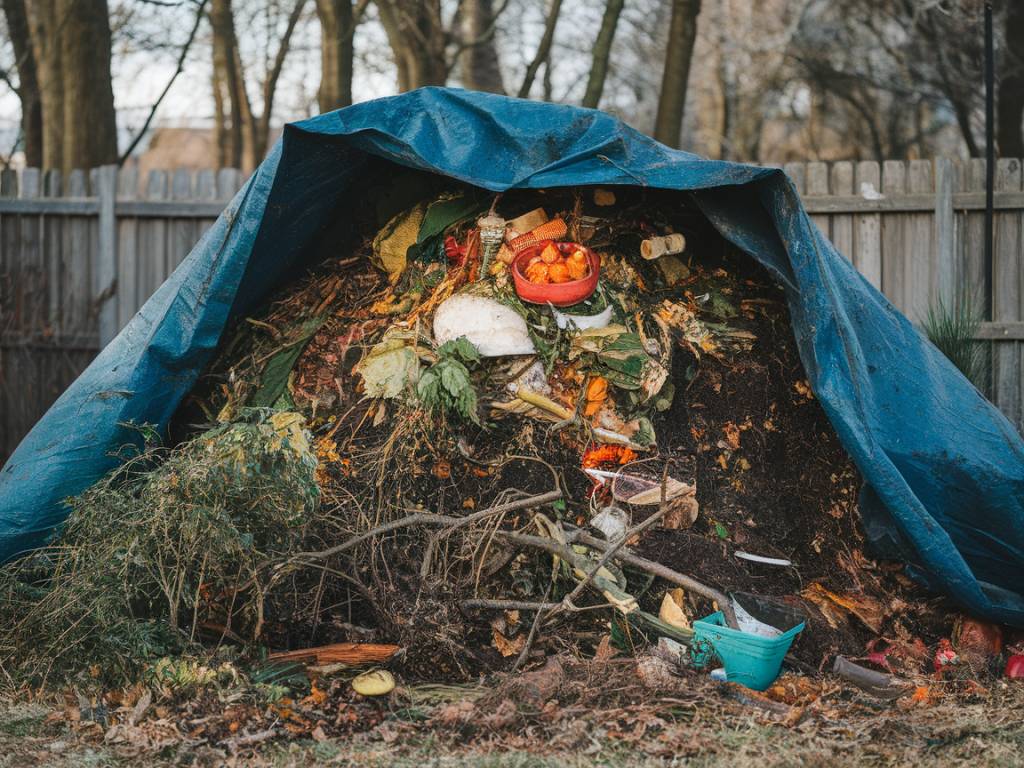
Insulating your compost pile can help maintain the necessary heat for decomposition. Use a tarp or a thick layer of straw to cover your pile. This not only helps retain heat but also prevents excessive moisture from snow and rain.
In addition, consider using compost bins or enclosures made of wood or wire mesh to help keep your compost protected from the elements and small animal intruders.
Aerating and Turning
One of the challenges of winter composting is ensuring that the pile gets enough oxygen. Even in winter, turning the compost pile is essential. Aim to turn it at least once every two weeks to keep air circulating, which helps speed up the decomposition process.
If your pile is frozen solid, don’t fret. Just wait for a milder day when it thaws a bit, and then give it a good turn. Also, poking holes in your pile with a garden fork can promote aeration if turning the whole pile isn’t feasible.
Adding Materials Gradually
In winter, it’s best to add compost materials in smaller, more frequent batches. This approach can prevent the pile from cooling down too much and helps maintain a consistent temperature.
Chop up food scraps into smaller pieces before adding them to the pile. Smaller pieces decompose faster and generate heat more efficiently. Always cover fresh greens with a layer of browns to deter pests and help balance moisture levels.
Monitoring Moisture Levels
Keeping an eye on moisture levels in winter composting is crucial. The pile should be damp, like a wrung-out sponge. Too much moisture can lead to compacting and anaerobic conditions, while too little can slow down the decomposition process.
If your compost pile is too wet, add more dry browns and avoid adding too many wet greens. Conversely, if it’s too dry, sprinkle it with a bit of water, but be careful not to overdo it.
Using a Compost Activator
To help kickstart the decomposition process, consider using a compost activator. Activators contain high levels of nitrogen and beneficial microbes that can boost the activity in your pile. You can make a natural activator by adding a mixture of well-rotted manure, blood meal, or even a small amount of finished compost.
Just sprinkle the activator between your compost layers as you build the pile. This can significantly improve the efficiency of your winter composting process.
Composting with Worms
Vermicomposting, or composting with worms, can be an excellent option for the winter months. Worms help break down organic matter faster than traditional composting methods and can thrive in a controlled environment.
Create a worm bin that can be kept in a garage or basement, where temperatures are more stable. Ensure the bin has good drainage and ventilation. Red worms (Eisenia fetida) are particularly well-suited for composting and are widely available.
Feed your worms kitchen scraps like vegetable peels and coffee grounds, but avoid adding meat, dairy, or oily foods. The worm castings they produce are incredibly nutrient-rich and make a fantastic addition to your garden soil come spring.
Patience and Persistence
Winter composting requires patience and a bit of persistence. The cold temperatures can slow down the decomposition process, but rest assured that even if your compost pile appears inactive, the microorganisms are still at work.
In early spring, give your compost pile a thorough turning and ensure it has the right balance of greens and browns. This will help restart the process as temperatures begin to warm up.
Embracing natural gardening methods, like maintaining a winter compost pile, can be incredibly rewarding. Not only does it reduce waste and enrich your soil, but it also helps create a sustainable garden ecosystem. With a bit of effort and care, your winter compost pile will keep your garden healthy and thriving year-round.
Happy composting!
Samanta

