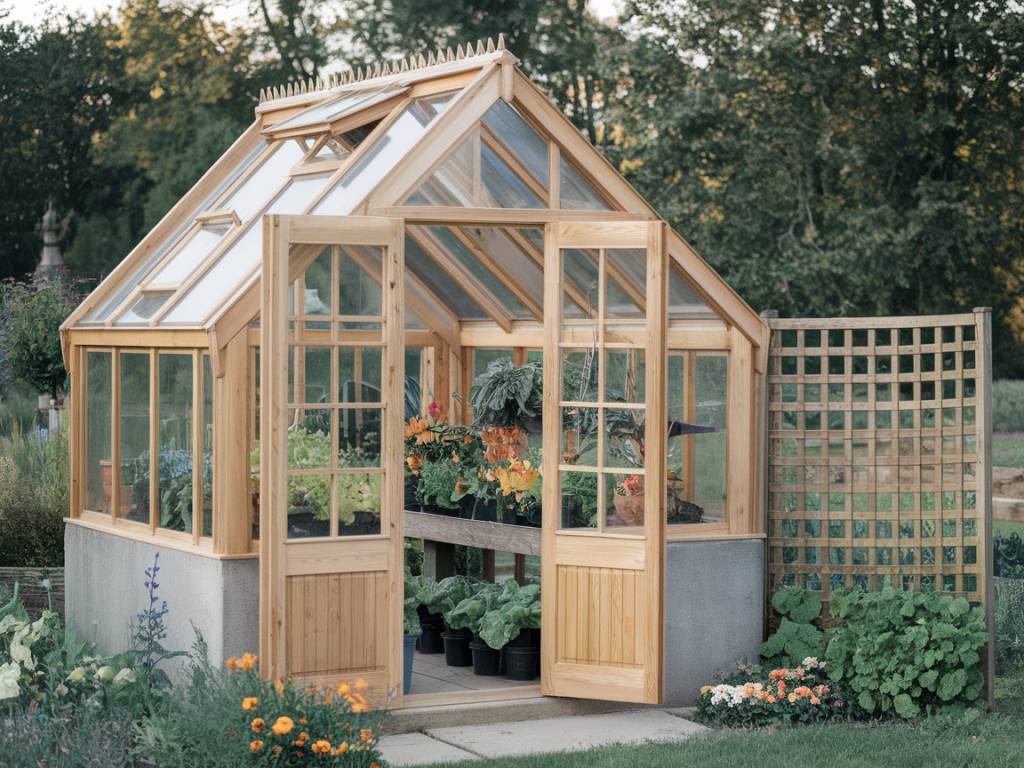
Gardening all year round is a dream for many of us, especially in the UK, where weather conditions can be quite unpredictable. But with a DIY greenhouse, we can manage to extend our growing season and protect our plants from the harsher elements. Building your own greenhouse can be an exciting and rewarding project, plus it aligns with our principles of sustainable and natural gardening. In this guide, I’ll share with you how to build a DIY greenhouse without breaking the bank and using materials that might already be at hand or easily sourced locally.
Choosing the Right Location
The first step in building your own DIY greenhouse is selecting the perfect spot. Location is key to maximizing sunlight exposure and ensuring your plants thrive.
When choosing your location, consider the following:
- Sunlight: Aim for a location that receives at least 6-8 hours of direct sunlight per day. South-facing spots are ideal in the Northern Hemisphere.
- Wind Protection: Try to find a spot that is sheltered from strong winds, which can reduce the effectiveness of your greenhouse’s insulation.
- Drainage: Good drainage is critical to prevent waterlogging. Avoid areas prone to flooding or that have overly compacted soil.
- Access: Ensure the location is convenient to access, especially if you’ll be carrying heavy materials or tools.
Gathering Materials
Next, you’ll need to gather the materials for your greenhouse. The good news is you don’t need to break the bank to create a functional and attractive greenhouse.
- Frame: You can use wood, PVC pipes, or metal for the frame. Wood is easy to work with and adds a rustic charm, while PVC pipes are more lightweight and flexible.
- Covering Material: Polyethylene film, polycarbonate panels, or even old windows and glass panes can be used to cover your greenhouse. Each material has its pros and cons, but polyethylene film is the most cost-effective and easy to handle.
- Fasteners: Use screws, brackets, or zip ties to hold your frame together and attach the covering material.
- Door and Ventilation: Don’t forget to include a door for easy access and some form of ventilation to prevent overheating.
Building the Foundation
A strong foundation is crucial to the stability and longevity of your greenhouse. Depending on your budget, location, and preferences, there are several options for creating a foundation.
Options to consider:
- Concrete Slab: A concrete slab provides a sturdy and level base that will last for many years. This option is more labor-intensive and costly but offers the most stability.
- Timber Base: A timber base made from treated wood is another strong and durable option. This can be easier to install compared to concrete but requires maintenance over time.
- Ground Anchors: If you’re looking for a less permanent solution, ground anchors can provide sufficient stability, especially for smaller greenhouses. Simply drive them into the ground and attach the greenhouse frame.
Constructing the Frame
Now it’s time to assemble the frame. Regardless of the material you choose, ensure you have accurate measurements and level surfaces to work with. Here’s a step-by-step guide:
- Measure and Cut: Begin by measuring and cutting your frame materials to the required lengths. If using wood, sand the edges to remove splinters.
- Assemble the Base: Lay out the base components on your foundation, forming a rectangle or square. Secure the corners with screws or brackets.
- Build the Walls: Attach vertical supports to the base at regular intervals (usually every 2-3 feet). Ensure these supports are level and straight.
- Add Reinforcements: Depending on the size of your greenhouse, you may need to add cross braces or additional supports for extra stability.
- Construct the Roof: Once the walls are in place, add the roof beams. An A-frame or gable roof is most effective for shedding water and snow. Make sure to include any necessary support beams.
Attaching the Covering
With the frame securely in place, it’s time to attach the covering material. Polyethylene film is the most common choice due to its affordability and ease of use. Here’s how:
- Cut the Film: Measure and cut the polyethylene film to cover each section of your greenhouse. Allow for extra material at the edges for securing.
- Attach to Frame: Start at one end and gradually stretch the film over the frame, securing it with staples, screws, or zip ties. Work your way around the greenhouse, ensuring there are no gaps or loose sections.
- Seal the Edges: Use weather-resistant tape or additional staples to seal the edges and prevent drafts.
- Install Doors and Vents: Cut openings for doors and vents. Install hinges for the doors and use mesh or ventilated panels for airflow.
Adding Final Touches
Your greenhouse is almost ready! The finishing touches will make it functional and efficient.
- Shelving and Benches: Install shelves or benches for your pots and plant trays. This will maximize your growing space and make tending to plants easier.
- Water System: Consider installing a rainwater collection or drip irrigation system to keep your plants hydrated without wasting water.
- Heating: If you plan to use your greenhouse during winter, a small heater or heat mats can help maintain optimal temperatures.
- Lighting: Supplemental lighting can be beneficial during shorter days. LED grow lights are energy-efficient and effective for promoting plant growth.
- Thermometer and Hygrometer: Monitoring temperature and humidity is essential for maintaining the best growing conditions. Place these instruments at eye level for easy reading.
By taking the time to properly build and equip your DIY greenhouse, you can enjoy the benefits of year-round gardening. Not only will it provide a protected environment for your plants, but it also supports our ethos of sustainable and natural gardening practices.
Happy gardening!
— Samanta

