There’s a quiet kind of courage in taking a pair of secateurs to a tree you love. One wrong cut and you worry you’ve ruined its shape forever; one right cut and suddenly the whole garden feels lighter, calmer, more alive. Tree pruning is a little like editing a story: you’re not trying to change the tree, only to help it say what it was always meant to say, more clearly.
Today, I’d like to walk you through the essential pruning rules every home gardener should follow – the ones that keep you safe, your trees healthy, and your cuts clean and kind.
Know why you’re pruning before you start
Before you even open your toolbox, ask yourself a simple question: What is the purpose of this cut? Pruning without a clear reason is the fastest route to over-cutting, stressed trees, and a very cross gardener by summer.
Good reasons to prune include:
- Removing dead, diseased or damaged wood
- Improving safety by clearing low or hazardous branches
- Letting in more light and air to the canopy
- Shaping young trees for a strong, balanced structure
- Encouraging better flowering or fruiting
If your answer is “because it looks messy” or “because I feel like I should,” pause. Walk around the tree. Look from a distance, then up close. Often what looks “messy” is simply natural growth that needs only a few thoughtful cuts.
Once you know why you’re pruning, it becomes much easier to know where and how much to prune.
Safety first – your body matters more than the branches
Pruning can be wonderfully meditative, but it still involves sharp metal, heights, and heavy limbs. Before you think about the tree, think about yourself.
Make these habits non‑negotiable:
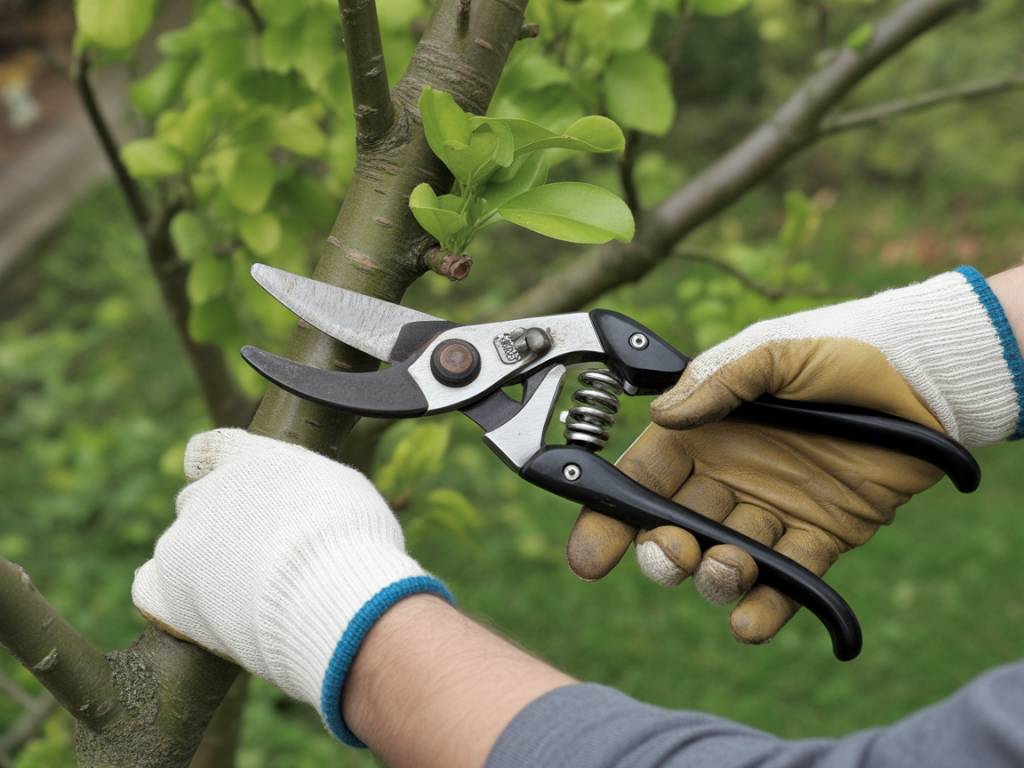
- Wear proper gloves and eye protection. Even a tiny twig can whip back and catch your eye. Safety glasses are far less glamorous than a rose arch… but infinitely more useful.
- Use stable footing. If you need a ladder, choose a sturdy one and have someone hold it if possible. Never overreach – if you’re stretching, the ladder is in the wrong place.
- Keep tools sharp and clean. Dull blades slip and force you to push harder. That’s when accidents happen.
- Know your limits. Thick, high branches or anything near power lines belong to a qualified arborist, not a Saturday afternoon experiment.
A simple rule: if you have to ask, “Is this safe?” the answer is usually “No – not on your own.”
Prune at the right time of year
Trees, like gardeners, have better and worse moments to face a bit of “surgery.” Pruning at the right time reduces stress and helps cuts heal faster.
Some gentle seasonal guidance:
- Late winter to very early spring (while trees are still dormant) is ideal for most deciduous trees. You can clearly see the structure, and the tree is ready to burst into new growth, sealing wounds efficiently.
- Summer pruning can be used to reduce vigorous growth and tidy up shape, especially for trees that tend to get a bit wild. However, avoid heavy cuts in very hot, dry spells.
- Autumn is generally not the best time for major pruning. Trees are starting to slow down, and cuts may heal poorly just before winter sets in.
- Spring‑flowering trees (like cherry or ornamental plum) are best pruned just after they finish flowering, otherwise you’ll remove next year’s blooms.
Evergreen trees, fruit trees, and ornamental species often have their own preferences, so it’s always worth checking the specific needs of your tree. But when in doubt, late winter is usually a safe, kind moment for structural work.
Use the right tool for the right branch
Good tools don’t just make life easier; they make cleaner cuts, which heal faster and are less prone to disease.
As a simple guide:
- Secateurs (hand pruners) – for branches up to about the thickness of your thumb.
- Loppers – for slightly thicker branches, up to about 3–4 cm, depending on the tool.
- Pruning saw – for anything thicker than that. A sharp pruning saw is often safer and more precise than wrestling with big loppers.
Choose bypass-style pruners (the blades pass by each other like scissors) for live wood. Anvil-style pruners (blade closing onto a flat surface) are better for dead, dry wood, where crushing doesn’t matter.
Whatever you use, keep it sharp and clean. A few strokes with a sharpening stone and a quick wipe with disinfectant between trees (or after diseased branches) can prevent spreading problems around your garden.
Always remove dead, diseased and damaged wood first
If you’re not sure where to start, begin with the “3 D’s”: dead, diseased and damaged. This instantly improves both the safety and health of the tree.
You can spot these branches by:
- Dead: brittle twigs that snap easily, no green layer beneath the bark when lightly scraped, no buds swelling in season.
- Diseased: odd discolouration, cankers, oozing sap, fungal growth, or leaves that look different from the rest of the tree.
- Damaged: cracked, split, or torn branches, often after storms or heavy winds.
Cut these back to healthy wood, making each cut just above a bud or at a branch collar (we’ll talk about that in a moment). Removing the 3 D’s often reveals a much clearer structure, and you may find you need far fewer aesthetic cuts than you first imagined.
Respect the branch collar – never cut flush to the trunk
This is one of the most important rules for cleaner, safer cuts – and the one most often broken.
The branch collar is the slightly raised, swollen area where a branch meets the trunk or a larger branch. It may look like a small ridge or a wrinkled doughnut of bark. This is where the tree naturally seals over the wound after pruning.
When you remove a branch, your cut should:
- Be just outside the branch collar
- Follow the angle of the collar (not necessarily perfectly vertical or horizontal)
- Leave the collar completely intact
What you should not do:
- Make a “flush cut” straight down the trunk, shaving off the collar
- Leave a long stub hanging out far beyond the collar
Flush cuts damage the tree’s natural defence zone and heal very poorly. Stubs die back, invite rot, and eventually become an entry point for pests and disease. A proper collar cut is neat, respectful and gives the tree exactly what it needs to close over cleanly.
Use the 3-cut method for larger branches
If you’ve ever tried to cut off a heavy branch in one go, you may have watched in horror as it tore away, ripping bark down the trunk. This isn’t just unsightly; it’s a real wound for the tree.
To avoid this, use the 3-cut method on any sizeable branch:
- First cut: On the underside of the branch, about 20–30 cm away from the trunk, cut in about one‑third of the way. This prevents a tear from running back to the trunk.
- Second cut: Move a little further out along the branch and cut all the way through from the top. The branch will break off, but any tear will stop where your first cut is.
- Third cut: Now remove the remaining stub with a careful cut just outside the branch collar.
This feels slower the first few times, but it saves so much heartache – for you and for the tree.
Thin rather than top – never “hat-rack” your trees
There’s a temptation, especially with fast‑growing trees, to simply cut everything back to a straight line along the top – a practice often called “topping” or “hat-racking.” It looks drastic because it is.
Topping:
- Creates large, poorly healing wounds
- Triggers a flush of weak, vertical shoots (often called “water sprouts”)
- Makes the tree less stable over time, not more
- Ruins the natural shape and character of the tree
Instead of chopping the top off, aim to thin the crown:
- Remove some inner, crossing, or congested branches to open up light and air
- Shorten overly vigorous shoots by cutting back to a healthy side branch or bud, not randomly in the middle
- Maintain the natural outline of the tree as much as possible
Think of it less as giving a buzz cut and more as a careful trim and restyle.
Remove crossing, rubbing and inward-facing branches
Once you’ve dealt with the obvious dead or damaged wood, it’s time to look at how the remaining branches interact with each other.
Branches that:
- Cross and rub together
- Grow straight inward towards the trunk
- Create dense tangles in the centre of the canopy
are all candidates for removal. Rubbing wounds invite infection, and tangled centres block air and light, encouraging disease and weak, spindly growth.
Choose the stronger, better-placed branch and remove the other. Over time, aim for a structure where branches:
- Radiate outwards like the ribs of an umbrella
- Are well spaced vertically along the trunk
- Have room to sway and grow without constantly bumping into their neighbours
This is especially important when shaping young trees; a little attention in the first years can spare decades of corrective pruning later.
Respect the one-third rule – don’t take too much at once
It’s surprisingly easy to get carried away. One branch leads to another, and before you know it, you’ve removed half the canopy and are standing there with a sinking feeling.
A simple guideline to protect both your tree and your peace of mind is the one‑third rule:
- Don’t remove more than about one‑third of the living canopy in a single season.
For mature trees, it’s often wise to take even less, especially if the tree has been neglected for years. Think of it as a gentle multi‑year makeover rather than a one‑day transformation.
If you realise you’re approaching that one‑third mark, stop. Step back. Live with the tree for a season and see how it responds before planning any further work.
Make cuts above buds or side branches, not in the middle of nowhere
Where you cut along a branch shapes how the tree will regrow.
When shortening a branch:
- Cut just above a healthy bud or a smaller side branch, rather than randomly halfway along the stem.
- Leave a tiny “collar” of wood above the bud (a couple of millimetres), rather than cutting right into it or leaving a long stub.
- Choose a bud that points in the direction you want the new growth to go – typically outward, not inward towards the centre of the tree.
This small detail makes a big difference to how neat and natural the new growth will look next season.
Skip the wound paint – let the tree heal itself
It feels intuitive to “bandage” a pruning cut with wound paint or sealing compounds. They look protective, like a plaster on a scraped knee. Sadly, for modern tree care, most experts recommend against them.
In most climates and situations:
- Well-made cuts at the right place heal best when left open to the air.
- Wound paints can trap moisture and decay under a glossy surface.
- Trees have evolved remarkable ways to seal off damaged tissue internally.
The best “treatment” for a pruning cut is simply:
- A correct cut at the branch collar
- Done at the right time of year
- With a clean, sharp tool
Then, trust the process. In a few seasons, you’ll often see a perfect, rounded callus of new tissue forming around your cut – one of the quiet miracles of tree life.
Stand back often – prune with your eyes as much as your hands
It’s easy to get lost inside the canopy, focusing on one branch, then another, without really seeing the whole tree.
Make a habit of:
- Stopping every few cuts to step back several metres
- Looking at the tree from different angles
- Checking both overall shape and balance of branches
Ask yourself as you look:
- Does the tree still look like itself, just lighter and clearer?
- Is there an obvious gap or imbalance forming?
- Have I opened up some light without making it look stripped?
You’re not trying to force a tree into a rigid, artificial shape. You’re helping reveal its best version of its own natural form.
Know when to call a professional
Part of being a confident home gardener is knowing when a job isn’t yours to take on.
Bring in a qualified arborist when:
- Branches are high enough to require climbing or complex ladder work
- The tree is large and overhanging buildings, roads or power lines
- You see significant decay, hollows, or signs of structural weakness
- Storm damage has left heavy, twisted or partially broken limbs
An experienced arborist won’t just cut; they’ll read the tree and its history, much like a doctor reading a patient’s notes. Watching a good one work is a lesson in humility – and often a relief.
Pruning as a quiet garden ritual
Done well, pruning is far more than a list of rules. It’s a slow, attentive dialogue with your trees. Over time you begin to recognise their habits – the branch that always stretches a little too far into the path, the twiggy growth that appears like a fringe each summer, the way the light falls differently once a single limb is removed.
If you remember nothing else, carry these thoughts with you when you pick up your tools:
- Know why you’re cutting before you cut.
- Start with safety – yours, then the tree’s.
- Work with the tree’s natural shape, not against it.
- Cut cleanly, at the right place, and not too much at once.
One day, perhaps in late winter when the air still carries a hint of frost, you’ll step back from a tree you’ve just pruned and notice a newfound clarity in its branches – a pattern of lines and light that simply feels right. That is the quiet satisfaction of pruning done with care: a tree that can breathe more freely, and a gardener who can, too.